

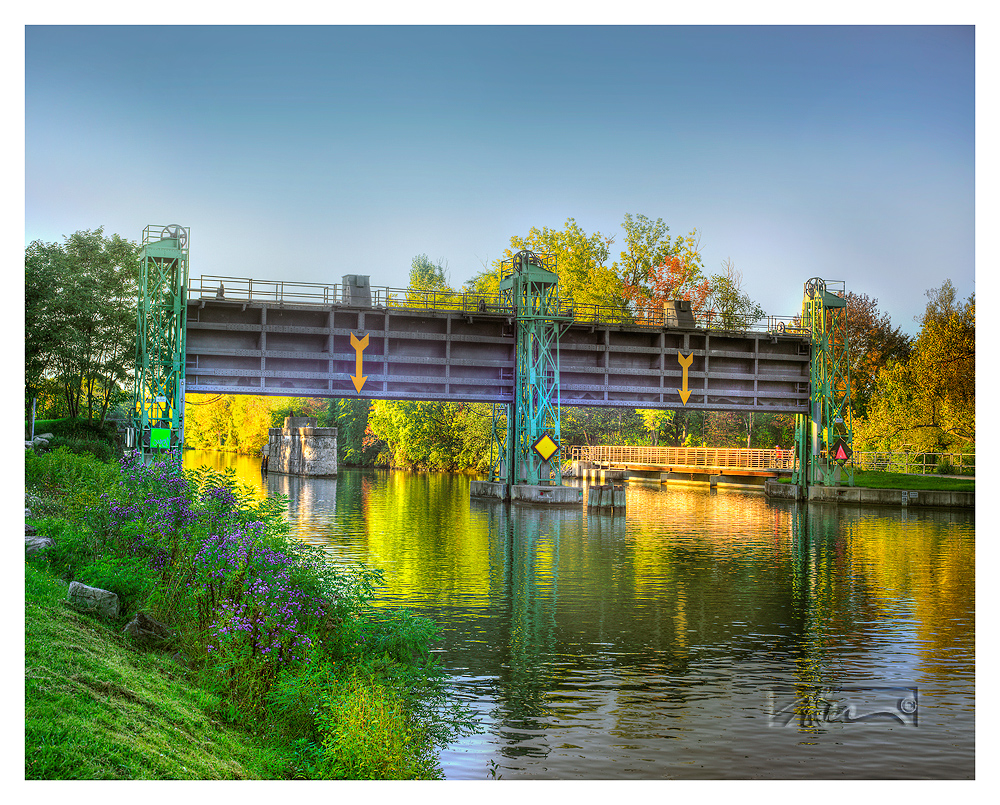
Erie Canal – © John Neel RhinoCam HDR
The RhinoCam
When it comes to pixels, if you want to make big images, the more you have the better.
As discussed in a few previous posts (see links below), the RhinoCam is a hybrid system, which is capable of producing medium format image resolutions using a Sony NEX camera.
The advantage to using such a device, is that you will capture many, many more pixels than a single capture will produce. Depending on the camera sensor, it is possible to capture a final stitched image that is the equivalent of +/-140-megapixel image. Considering that the average DSLR sensor is somewhere between 16 and 24- megapixels, that is a bunch of pixels. The final image can be pretty spectacular.
Please read – Disclosure
For the record, I decided to use a NEX 6 rather than a NEX 7 to reduce the file sizes. The NEX 6 has a 16 megapixel sensor rather than the 24 megapixels of the NEX 7. I have found the smaller sensor saves some work and allows me to produce images that are pretty amazing yet small enough to save disk space on my camera cards and hard drives. I also considered the price difference between the two cameras as a factor. However, if you really need the bigger size, you can certainly have it.
The image shown above turned out to be approximately 11,540 pixels wide by 9,150 pixels high after the stitch, which ends up at slightly less than 106-megapixels. For me, the NEX 6 has plenty of pixels for creating the 30″x40″ size prints I was targeting without any need for interpolation. The file size is approximately 350 megs. which makes it perfect for my purpose.
Most any digital camera would need to be interpolated up considerably in order to achieve image sizes larger than 11″x14″ or 16″X20″. And we all know that interpolated pixels are not the same as actual pixels.
By comparison, the APS-C NEX 6 RAW File is 4928 x 3276 pixels, when printed at 300 dpi, produces a 16.427″ X 10.92″ print without interpolation. To achieve a 30″X40″ print from a single frame NEX 6 image file would require an 250% +/- interpolation as well as cropping to fit the 30X40 dimensions of the final image. See the comparison between the sensor size of the camera I used and the Nikon D800 to my RhinoCam results at 300 dpi below.
You can read here to see what happens when you interpolate pixels.
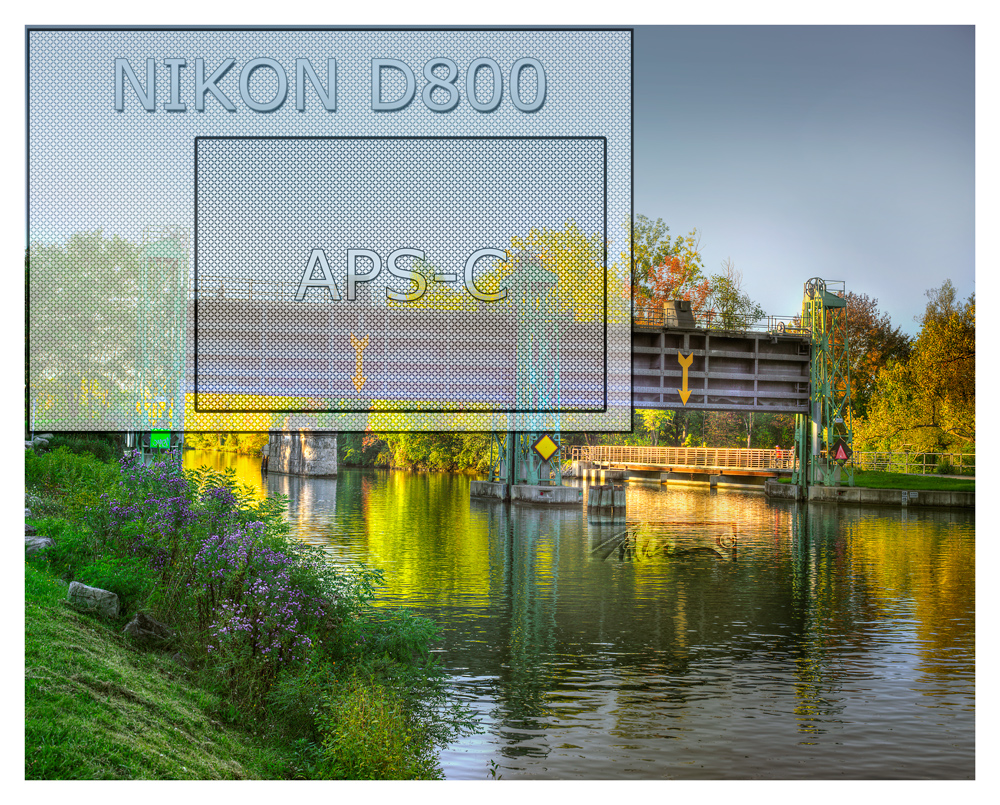
Comparison showing relative sizes between Sony NEX 6, Nikon D800 sensors and the RhinoCam file sizes.
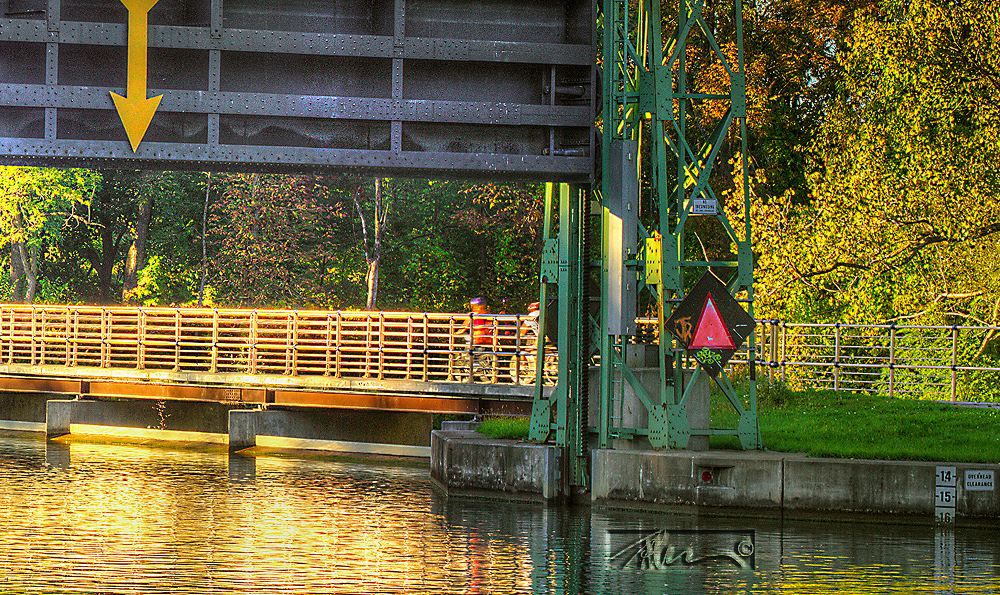
Detail – not to scale

Detail – not to scale
A sliding mechanism allows the camera to shoot multiple rows and columns that can be stitched together to form amazing resolution. While stitching is not a new concept, this camera system takes advantage of the image circle produced by medium format lenses. The lens is used in a single position while mounted to a tripod and the camera is simply moved to a new area of the image circle, thus maintaining proper alignment to the lens axis and eliminating the problems associated with parallax.
The Rhinocam has allowed me to create images that have a resolution almost impossible to create by any other digital method. The advantage of this system over most others is in maintaining the lens position throughout the capture process. This makes it easy to produce the stitches as well as maintaining the actual perspective characteristics of the medium format lens.
Using the RhinoCam requires the use of a steady tripod. The taking lens that I am using currently is from a Hasselblad. The lens is an 80mm Planar, which is attached to the RhinoCam itself which in turn is mounted to a fixed position on the tripod. The Sony NEX camera is mounted to the back of the RhinoCam in either a vertical or horizontal position depending on the type of image desired. Exposures should be done in manual. The aperture settings on the medium format lens controls the aperture and the camera controls the shutter.
In some ways, using the RhinoCam is similar to using a large format camera such as a 4×5 in that the aperture needs to be opened up for focusing and stopped down manually just prior to taking the picture. This means following a specific sequence in order to insure proper focus, depth-of-field and exposure. This sort of discipline is part of the large format shooting process, which I happen to love.
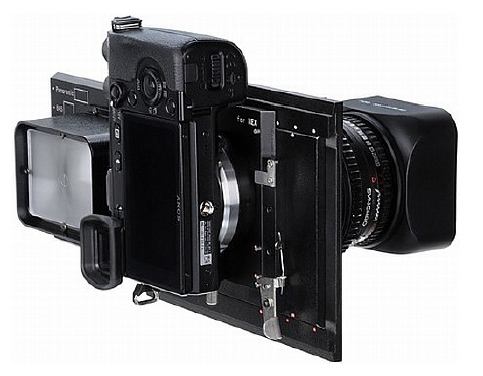
RhinoCam
The RhinoCam mates a medium format lens to an APS-C sensored Sony camera. The relatively small sensor captures segmented portions of the much larger image circle created by the medium format lens.
There are two basic shooting patterns, which allow for either a Panorama or a 645 format. The shooting pattern is sequenced by moving to different orientation marks on the device to capture portions of the scene. Basically, you begin in a corner and move horizontally to the next position until all of the overlapping shots are completed. Panorama images are shot with the camera in the horizontal position and 645 format is done in the vertical position. Panorama images require six shots and 645 requires eight.
Exposures are best produced using manual settings so as to keep the exposures consistent throughout the process.
Normally, I shoot an HDR exposure sequence at each position to produce HDR images. That means at least three shots per position on the RhinoCam. Each set of images is processed through HDR software and then each HDR is stitched through a stitching program to create the final image.
Lately, I have been using the device to shoot square imagery by modifying the way I move the camera through the various positions. rather than using the standard mark positions, I use in betwwen points as guides for producing a square shot pattern.
The RhinoCam is not a perfect solution. On the downside, it is difficult to capture motion, It requires a tripod, the process takes time and it takes a lot of computer processing to produce the final files. However, it is one of the few ways to produce giant images that do not need interpolation. Until there is a giant sensor available at a reasonable cost, this is at least a pretty clever digital alternative for those interested in detail.
Links to other posts I’ve written about RhinoCam:
Read more about the RhinoCam here: http://www.fotodioxpro.com
I hope to discuss another alternative to this technique soon.
You can read about my book “Rethinking Digital Photography” here. Please have a look at some of my other posts here.
NOTICE of Copyright: THIS POSTING AS WELL AS ALL PHOTOGRAPHS, GALLERY IMAGES, AND ILLUSTRATIONS ARE COPYRIGHT © JOHN NEEL AND ARE NOT TO BE USED FOR ANY PURPOSE WITHOUT WRITTEN CONSENT FROM THE WRITER, THE PHOTOGRAPHER AND/OR lensgarden.com. THE IDEAS EXPRESSED ARE THE PROPERTY OF THE PHOTOGRAPHER AND THE AUTHOR.
