

PART 2

Image 1
As I stated in the first related posting,…
120 Matchbox Pinhole Project – Part 1
…one of my to-do projects for WPPD 2012 was to build a working 120pinhole camera from a large kitchen matchbox.
This is the second of a number of posts that will be devoted to the construction and the use of such a camera.
Although I have built smaller 35mm pinhole cameras from regular matchboxes, I had never built one with this size matchbox until I got the idea a couple of years ago. While the first one worked pretty well, I have decided to make a few minor alterations in order to make the camera a little more durable.
So, in that sense, it will be a work in progress. The only thing I knew at that point was that that a large size matchbox has the same height dimension as a roll of 120 film. I also realized that 120 film which does not have a cassette, would require a much more robust system to make it function in this setup.
To begin, I will need to make a chamber that will be light tight, add the pinhole, a shutter and create a way to advance the film to a new frame! Sounds easy. But the actual design needed to be well thought out.
PLEASE READ! – As this is a learn as I go project, I will not post this as a single post tutorial. I am showing you my progress in the hopes of getting you interested in the building process. In the end, you can follow through the links that will show you the complete step-by-step build.
Here is where I am at the moment:
Image 1 – (above) The front of the matchbox has been marked to indicate the location of the pinhole.
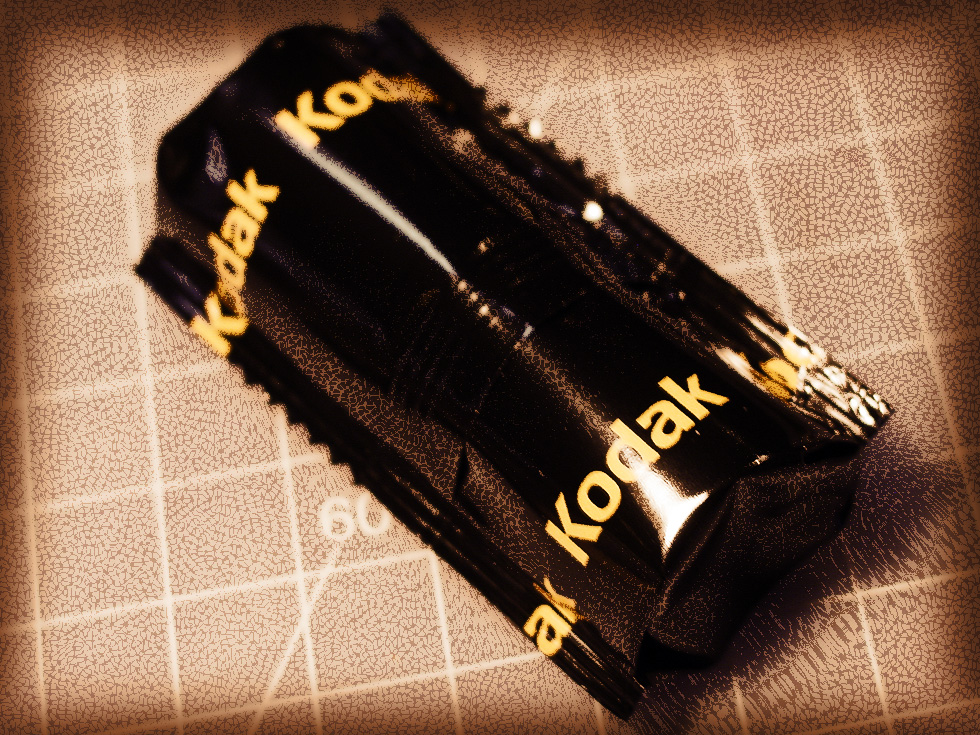
Image 2 – Roll of 120 film
Image 2 – This is a packaged roll of 120 film. I will likely use a roll of Kodak Portra, but you might also consider using Ilford black and white, Fujifilm Fujicolor, or perhaps one of the Shanghai or Lucky brand films from China. A great resource for different 120 films is www.freestylephoto.biz. Most good camera stores still carry rolls of 120 film.
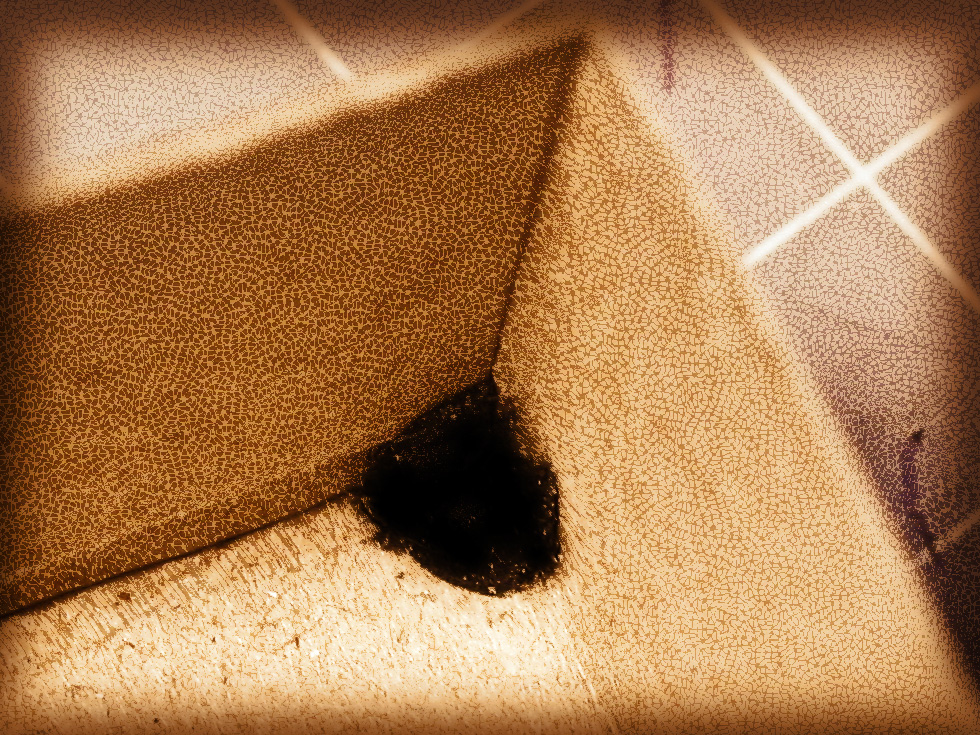
Image 3 – Corner plug
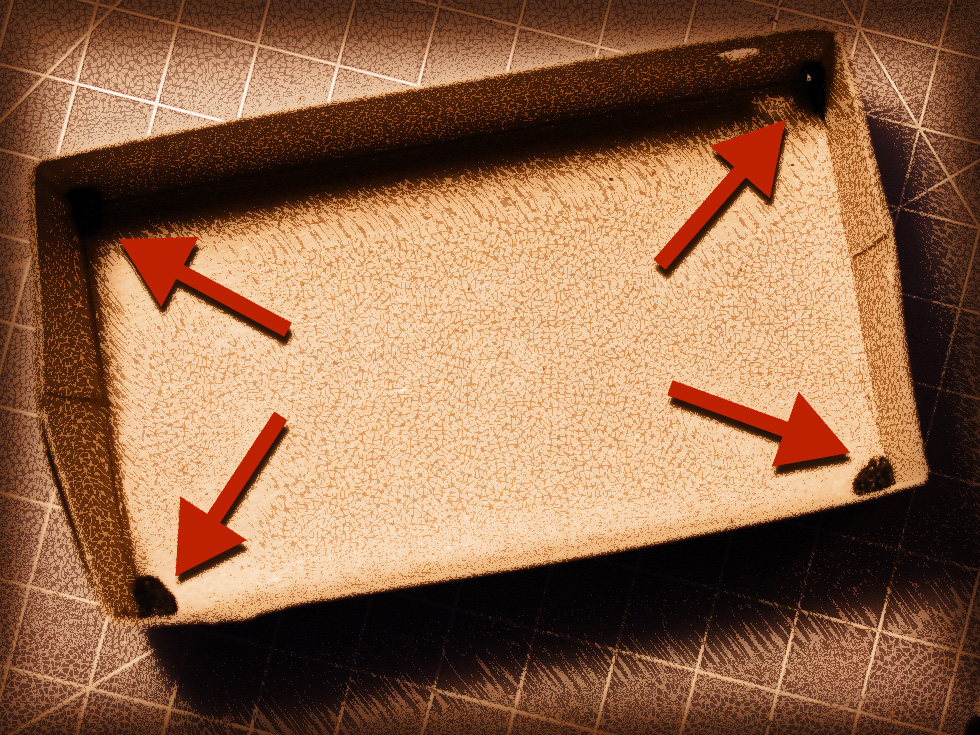
Image 4 – Sealing points
Image 3 and 4 – The inside of the matchbox requires some lightproofing. To begin with, the bottom corners need to be plugged for light leaks. I used a small bit of soft black Sculpi modeling clay. You can use black tape or even tiny pieces of the black felt stuffed into the holes with a little glue. There will be more light-proofing to do as we go through the build.

Image 5 – Folded light baffle
Image 5 – This is a template for a folded baffle that I cut from a piece of blackened paper. You could use a side of a cereal box. The final baffle is folded to produce a pathway for the film to travel through the camera while also acting as a film support. Once cut and folded the baffle will also act as a frame for the images. For now, this one is simply a template that will be used to cut a more robust version out of more ridgid material.
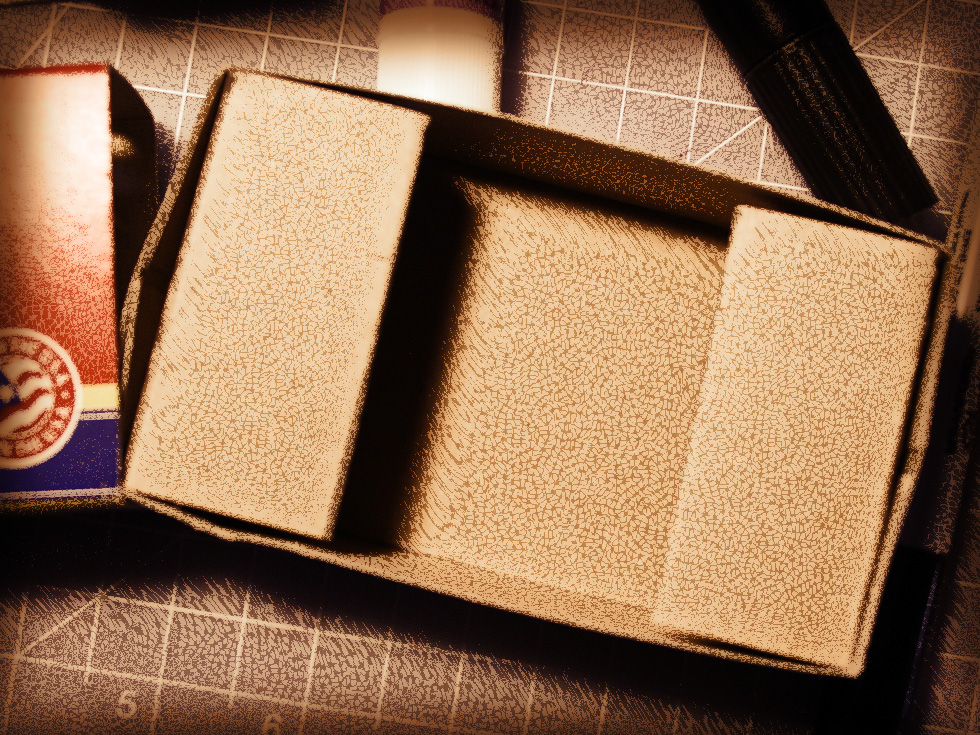
Image 6 – Baffle shown in place
Image 6 – Here is how it will fit inside the box. Notice I have yet to cut the film frame out of this template.
To be continued in posts to follow.
In the next several stages, I will still need to produce a light baffle for the outside sleeve, create a light resistant method for advancing the film, create and install the pinhole, create a simple shutter mechanism and find a way to advance the film so that it matches the exposure frame without producing overlapped frames. After that, all that is necessary, is to find subjects and shoot the roll.
If all goes well, I should end up with at least 12 shots and some interesting pinhole pictures that I hope to scan into the computer and take into Photoshop to produce some great photographic art.
BTW, this camera should be totally reusable when it is finished.
For me, pinhole projects are always fun. I have no doubt that it is going to be another working camera before too long.
You might want to go back to the original post to read more about this project. 120 Matchbox Pinhole Project
Find out more about Worldwide Pinhole Photography Day:
Between now and WPPD, look for my posts about pinhole cameras that you can make or purchase along with some great pinhole images taken with them. http://lensgarden.com
Links:
Are You Ready? The next pinhole day is April 26, 2015
120 Matchbox Pinhole Project – Part 1
Dirkon – The Paper Pinhole Camera
This is a poster that I created for the WPPD event.
Get a 2014 WPPD poster here: 2014 Worldwide Pinhole Photography Day – Promo Posters
My book – Rethinking Digital Photography
Read more about Pinhole Photography and other great photographic techniques in my book Rethinking Digital Photography.
NOTICE of Copyright: THIS POSTING AS WELL AS ALL PHOTOGRAPHS, GALLERY IMAGES, AND ILLUSTRATIONS ARE COPYRIGHT © JOHN NEEL AND ARE NOT TO BE USED FOR ANY PURPOSE WITHOUT WRITTEN CONSENT FROM THE WRITER, THE PHOTOGRAPHER AND/OR lensgarden.com. THE IDEAS EXPRESSED ARE THE PROPERTY OF THE PHOTOGRAPHER AND THE AUTHOR.
