As I stated in the first two related postings, one of my to-do projects for WPPD 2012 was to build a working 120 pinhole camera from a large kitchen matchbox.
This is the third of a number of posts that will be devoted to the construction and the use of such a camera.
Although I have built smaller 35mm pinhole cameras from regular matchboxes, I had never built one with this size matchbox until I got the idea a couple of years ago. While the first one worked pretty well, I have decided to make a few minor alterations in order to make the camera a little more durable.
So, in that sense, it will be a work in progress.
PLEASE READ! – As this is a learn-as-I-go project, I will not post this as a single post tutorial. I am showing you my progress in the hopes of getting you interested in the building process. In the end, you can follow through the links that will show you the complete step-by-step build.
Here is where I am at the moment with Part 3:
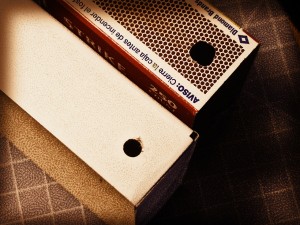
Image 7 – To create a light resistant method for advancing the film through the camera, I punched a few holes on the side of the box where the takeup spool will go inside the camera. You will need one hole on the inside box and one to match it on the outside sleeve. The holes need to be centered approximately 1/2″ from the end of the top right side of the box.
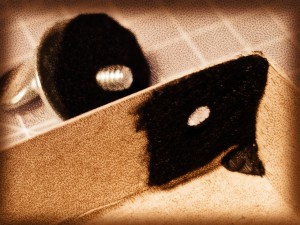
Image 8 – The hole should accommodate a 1/4″ thumbscrew. Here, I have glued a small piece of felt material to the inside of the inner box at the location of the punched hole. Once the advance take-up film spool is in place, this should block any light from entering through the opening.
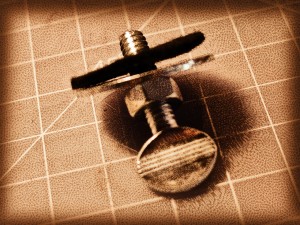
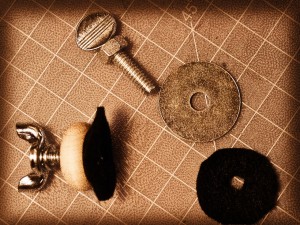
Image 9 and 10 – A 1/4-20 thumbscrew, 1/4-20 hex nut, 1/4″ flat washer and a piece of felt are assembled as shown. A hole punch is used to make the hole in the felt.
Image 10 – Here I used a Thumbscrew. A Wing-bolt can also work.
In the next related post, I’ll add a film guide to the interior, an image frame and a light baffle to the interior box.
I still need to produce a light baffle for the outside sleeve, add a second film spool, create a simple shutter mechanism, create the pinhole, and find a way to advance the film so that it matches the exposure frame without producing overlapped frames. After that, all that is necessary, is to shoot the roll. If all goes well, I should end up with at least 12 shots and some interesting pinhole pictures that I hope to scan into the computer and take into Photoshop to produce some great photographic art.
BTW, this camera should be totally reusable when it is finished.
Are You Ready? The next pinhole day is April 27, 2014
120 Matchbox Pinhole Project – Part 1
120 Matchbox Pinhole Project – Part 2
This is a poster that I created for the 2014 WPPD event.
Get a 2014 WPPD poster here: 2014 Worldwide Pinhole Photography Day – Promo Posters
My book – Rethinking Digital Photography
Read more about Pinhole Photography and other great photographic techniques in my book Rethinking Digital Photography.
NOTICE of Copyright: THIS POSTING AS WELL AS ALL PHOTOGRAPHS, GALLERY IMAGES, AND ILLUSTRATIONS ARE COPYRIGHT © JOHN NEEL AND ARE NOT TO BE USED FOR ANY PURPOSE WITHOUT WRITTEN CONSENT FROM THE WRITER, THE PHOTOGRAPHER AND/OR lensgarden.com. THE IDEAS EXPRESSED ARE THE PROPERTY OF THE PHOTOGRAPHER AND THE AUTHOR.


