

Making a Pinhole Aperture
This is the sixth of a number of posts that will be devoted to the construction and the use of my 120 Matchbox Pinhole Camera.
PLEASE READ! – As this is a learn-as-I-go project, I will not post this as a single post tutorial. I am showing you my progress in the hopes of getting you interested in the building process. In the end, you can follow through the links that will show you the complete step-by-step build. To see previous posts use the links below.
Here is where I am at the moment with Part 6:
Creating the pinhole can be as simple as poking a tiny hole in a piece of tin foil. You can purchase a ready-made pinhole that is laser precise. You can also do it yourself with a needle and a small piece of aluminum or brass shim-stock. I have used all of the above and invented a dozen others. To produce an image all you really need is a tiny hole. However, if you want a sharp image and you want to do it yourself, you need to make the opening a certain size and as round as you can make it. It really isn’t that difficult. It is actually very easy to do.
All you need is a piece of very thin piece of aluminum cut from the side of a soda pop can, a piece of cardboard, a needle (the pin), and perhaps a pair scissors. Personally, I like to use a small sheet of brass shim-stock that is easily found at a small hardware store or auto parts store.
While there is a formula for making the ultimate pinhole, there is a great sense of ownership and pride in discovering that pinhole photography can be done within very loose tolerances.
To produce a pinhole:
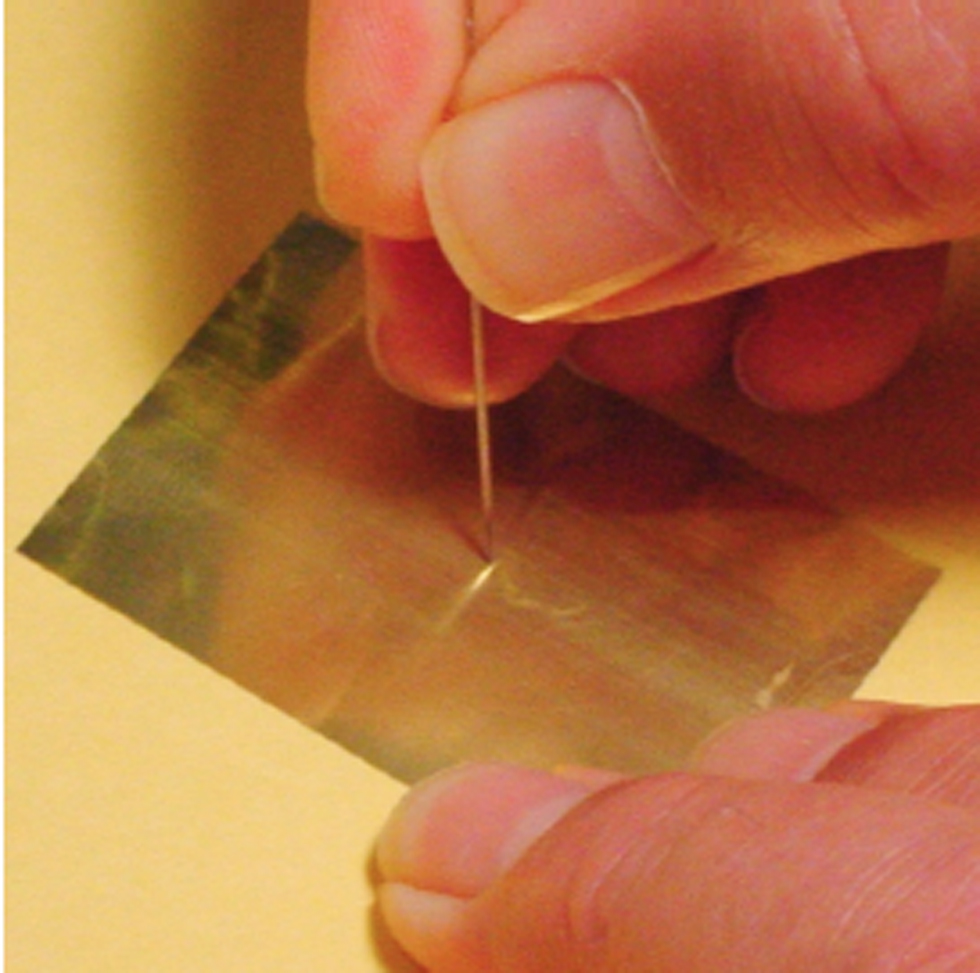
Using a piece of cardboard as a work surface, carefully press the tip of the pin into the center of a 1″ x “1 piece of the aluminum or brass sheet. The pinhole should not be much larger than a tiny point, a small dot or a period. I usually twist the pin back and forth to make the hole as round as possible. Check it against a light to see your progress.
There are a few simple things you can do that will make the pinhole produce better results. Lightly sanding the pinhole surface with a very fine emery cloth or rubbing the opposite side to remove the burrs created by the pin. I usually perform this with the edge of the scissors or the rounded end of a spoon handle while being careful to not increase the diameter of the pinhole. Rubbing in a single direction will cause the hole to elongate.
In the image shown above, I am using a brass shim rather than a piece of aluminum. The brass comes in different thicknesses. The thinner the better. But not so thin as to crumple, bend or tear. I also check my work for roundness and burrs with a small magnifier loupe. The cleaner and rounder the opening, the sharper the image results. I also want to make sure that I have produced a single pinhole. If you are not careful, it is easy to accidentally poke two or more holes.
Once the aperture is produced, you might want to use a black marker on the side facing the camera to blacken the area around the pinhole. I usually blacken both sides making sure that the ink does not fill the pinhole. This will help to ensure that extraneous light will not create problems caused by internal reflections.
For best results with the 120 Matchbox Camera, the size of the actual pinhole aperture should be approximately .25 > .3 mm. This will give you a working aperture of approximately f/140 – f/116. I think it might be interesting to see what your first attempt creates before you get too technical. However, here is a link showing you how to accurately measure the pinhole. Pinhole Photography – How to measure the diameter of a DIY pinhole aperture
Once you have produced a pinhole to your satisfaction, set it aside until we get to the mounting step of the project.
Previous Posts:
120 Matchbox Pinhole Project – Part 1
120 Matchbox Pinhole Project – Part 2
120 Matchbox Pinhole Project – Part 3
120 Matchbox Pinhole Project – Part 4
120 Matchbox Pinhole Project – Part 5 – Shutter
Rethinking Digital Photography – John Neel
My book – Rethinking Digital Photography
Read more about Pinhole Photography and other great photographic techniques in my book Rethinking Digital Photography.
NOTICE of Copyright: THIS POSTING AS WELL AS ALL PHOTOGRAPHS, GALLERY IMAGES, AND ILLUSTRATIONS ARE COPYRIGHT © JOHN NEEL AND ARE NOT TO BE USED FOR ANY PURPOSE WITHOUT WRITTEN CONSENT FROM THE WRITER, THE PHOTOGRAPHER AND/OR lensgarden.com. THE IDEAS EXPRESSED ARE THE PROPERTY OF THE PHOTOGRAPHER AND THE AUTHOR.
